
In the first part of the HTML form tutorial we saw how to create a basic form using simple text boxes. In this part, we will see some more input elements.
Check box
If you want to add a toggle input item that the user can select or deselect, use a check box input item.
<input type="checkbox" name="Agree" value="yes" />
name=“Agree” The name used to identify this input on the server side script.
value=“yes” This is the value returned to the server if the user selects this check box. This is an optional attribute.
For example, if you created a check box like this:
<input type="checkbox" name="sendmail" />
and if the user selects the check box, the server side script will receive: sendmail='on'
If the check box is like this:
<input type="checkbox" name="sendmail" value="send" />
if the user selects this check box before submitting, the handler script will receive: sendmail='send'
checked=‘checked’ Having the ‘checked’ attribute makes the check box ‘on’ by default.
Example:
<input type="checkbox" name="sendmail" value="send" checked="checked" />
Radio Button
Radio buttons are for selecting one item from a set of choices. Use radio buttons when the choices are not too large (less than 10). Each individual button need to be created using input type ‘radio’ Example:
<input type="radio" name="gender" value="male" />
The buttons in the same group should have the same name. Example:
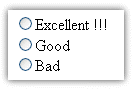
How do you rate the content at this site?
<p>
<input type="radio" name="rating" value="excellent">Excellent !!! <br/>
<input type="radio" name="rating" value="good">Good <br/>
<input type="radio" name="rating" value="bad">Bad <br/>
</p>
If the user selects excellent, the server side script will receive: rating='excellent'.
You can add ‘checked’ attribute to make a radio item selected by default.
Drop down list

When you want to create a list of items for the user to select from, create a drop down list. Unlike the input tags we saw before, the list has two HTML tags associated - the <select> tag and the <option> tag.
You can create a list using the <select></select> tag and the items in the list using the <option> tag.
An example will make it clear:
Shipping method:
<select name="shipping">
  <option value="1"> standard</option>
  <option value="2"> 2-day</option>
  <option value="3"> overnight</option>
</select>
If the user selects 2-day, the server side script will receive: shipping=2.
If you want to make an option selected by default, you can add “selected” attribute to the <option> tag.
<option value="1" selected='selected'>Standard</option>
makes the standard shipping method selected by default.
List box with Multi-selection
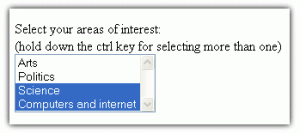
It is possible to allow multiple selection in the list. Use ‘multiple’ attribute in the ‘select’ tag.
Use the size attribute to specify the number of items visible (without scrolling) in the list box.
Example:
Select your areas of interest: (hold down the ctrl key for selecting more than one)<br />

<select multiple name="interests" size="4">
  <option value="arts">Arts</option>
  <option value="pol">Politics</option>
  <option value="sci">Science</option>
  <option value="comp">Computers and internet</option>
</select>
If the code above is included in the form, the user will be able to select any combination of options. Suppose the user selects ‘Arts’ and ‘Science’. The server side script will receive the values like this:"interests=arts" "interests=sci" .
Multi-line text
When you want to get a bunch of text from the user, the Textarea can be used.
A TextArea is created using the tag <textarea>
Attributes: name=“descr” the name identifies this TextArea in the server side script.
cols=“columns” Defines the width (number of characters per line) the text area can accommodate without scrolling.
rows=“rows” Defines the number of lines (number of rows) the text area can accommodate without scrolling.
Example:
Enter your suggestions here:
<textarea name="suggestions" rows="5" cols="25"></textarea>
If you want to provide some value in the text area by default, you can give it like this:
<textarea name="suggestions" rows="5" cols="25">my suggestions are:</textarea>
Updating the sample form
Let us add a check box, radio button , drop down list and a multi-line text field to our form:

<form id='sampleform' method='post' action='' >
<p>
Name: <input type='text' name='Name' />
</p>
<p>
Email: <input type='text' name='Email' />
</p>
<p>
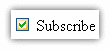
<input type="checkbox" name="subscribe" checked />Subscribe to the News Letter
</p>
<p>
Format of the Email:
<p>
<input type="radio" name="format" value="html" checked='checked' />HTML
</p>
<p>
<input type="radio" name="format" value="text" />Plain Text
</p>
</p>
<p>
Type of subscription you want:
<p>
<select name="type">
<option value="standard">Standard - Free</option>
<option value="prof">Professional - Paid</option>
</select>
</p>
</p>
<p>
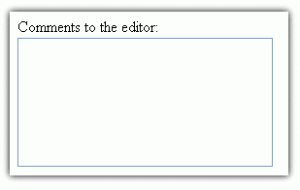
Comments to the editor:<br/>
<textarea name="comments" rows="7" cols="30"></textarea>
</p>
<p>
<input type='submit' name='Submit' value='Submit' />
</p>
</form>
We have seen some very common input types. Before looking into more advanced input items, you can test the form we have developed.
The code is available in the HTML file: HTML form tutorial example
Previous Part: HTML Form Tutorial
Next Part: HTML Form Tutorial Part III : Still More Input Elements
See Also
- HTML Form Tutorial Part III : Still More Input Elements
- HTML Form Tutorial Part IV: Server Side Form Processing
- HTML Form Tutorial
- A Modern Reintroduction To AJAX
- How to make a web form and get it online quickly
- JavaScript Button
- JavaScript Popup Windows
- Using the window.close method
- Using the window.open method
- Can JavaScript email a form?