
Password input
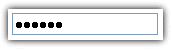
Login screens usually have a password field where the user enters his password. You can create a password field by using the input type ‘password’.
A password field can be created using the following code:
<input type="password" name="pwd" />
Other attributes:
maxlength=“maxChar” the maximum length (in characters) the password can have
value=“textValue” The default value that should appear in the password field.
“Hidden” input
The ‘hidden’ input is not shown to the user. Instead you yourself will provide the value of the field.
Usually, the hidden fields will contain configuration information for the server-side action script that handles the form data.
Example:
<input type="hidden" name="admin-email" value="me@myserver.com" />
Image input type
You can use your own beautiful images instead of the submit button to submit a form.
When the user clicks on the image, the form is submitted.
Use the following code to create an image input item.
<input type="image" name='signup' src="images/signup.gif" />
src=“image_url” The URL of the image file to be loaded. You can specify the relative URL to the image file.
Name Identifies the image that was clicked. The co-ordinates of the location where the user clicked is passed like this: image_name.x=x-coordinate and image_name.y=y-coordinate
File upload
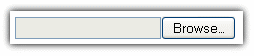
You would have seen pages which allows the user to upload a file. The FILE input adds a file upload box to the form.
Here is the syntax of FILE input type:
<input type="file" name="name" />
name=“name” The name used to identify this file input item in the server side script.
In most of the browsers, the FILE input will create a filename box with a 'Browse ...' button.
While creating a form with file upload support, do remember to add an attribute ’enctype’ wth value “multipart/form-data” in your <form> tag.
Here is an example:
<form enctype="multipart/form-data" method="post">
<p>
Photo: <input type="file" name='photo' />
</p>
<input type="submit" value="submit" />
</form>
General button
A button input just displays a button on the form. To add meaning to the button, we need to add JavaScript code to handle the event when the user presses the button.
An example of button is given below:
<input type="button" onclick="javascript:alert('Clicked');" value="Click!">
This code displays a button with label "Click!". On pressing the button, a message box with message ‘Clicked’ is displayed.
Reset button
When the user presses the Reset button, all the elements in the form are reset to their default values. The code below creates a reset button
<input type="reset" value="Start Over">
This code displays a button with label ‘Start Over’.
Previous part: HTML Form Tutorial Part II : More Input Elements
Next Part: HTML Form Tutorial Part IV: Server Side Form Processing
See Also
- HTML Form Tutorial Part II : More Input Elements
- HTML Form Tutorial Part IV: Server Side Form Processing
- HTML Form Tutorial
- A Modern Reintroduction To AJAX
- How to make a web form and get it online quickly
- JavaScript Button
- JavaScript Popup Windows
- Using the window.close method
- Using the window.open method
- Can JavaScript email a form?